Skip to content


Tricks and Tips for Dyeing Fabric Ready For Dressmaking

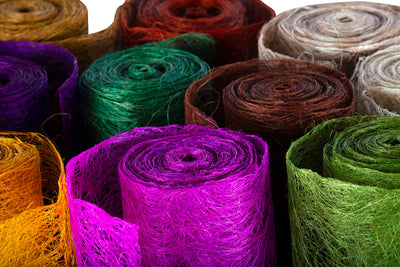
Don’t be limited to choosing standard colours for your fabrics, instead get your hands dirty and experiment with adding your own colours with the help of fabric dyes. In this article, we’ll run you through some tips and tricks to help you master the art of fabric dyeing and show you how to create some spectacular colours that you’ll love.
Use natural fabrics
Fabrics with natural fibres will generally be easier to dye than their synthetic counterparts as the dye will take more readily to the natural fibres. For your first dyeing project you’ll want to stick with cotton, linen, silk and wool before moving to other fabrics as well as trim and other accessories.
Start with a blank canvas
While it is always best to start with white fabric this is not always possible, especially if you are looking to reinvent a coloured item. Use a colour remover to help rinse the previous colour from your fabric to help whiten or lighten it ready for you to dye.
Fabric dyeing guide
Once you’ve prepared your fabric you’ll be ready to get started and begin dyeing following the simple steps below:
Step-1: If your fabric is new then make sure you wash it prior to dyeing. Cover your work surface with a waterproof cloth and then fill a large bucket, bin or other suitable container with very hot water (use warm water for wool) you want the fabric to be loose in the container so make sure it is big enough.
Wearing rubber gloves follow the instructions on your dye to add this to the water and add salt for cotton or linen and white vinegar for wool or silk as this will help the fabric take the dye.
Step-2: Add your fabric to the dye mixture and thoroughly wet the fabric using a stainless steel spoon to move the fabric around the water. You should keep the item in the dye for approximately 10 – 15 minutes until it is slightly darker than the colour you want.
Step-3: Once you have achieved the colour you want from the dye you will need to carefully remove the fabric from the due and rinse it in running water, starting warm and going cooler until the fabric runs clear. You could also use your washing machine’s rinse cycle to do this. Remember to wash out your dye bucket immediately afterwards.
Step-4: With the dyeing complete you’ll need to wash the item with a mild detergent on the cold cycle of your washing machine which will help to lock in the dye and keep the colour.
Creating your own colours
Once you’ve got used to the dyeing process you can start creating your own colours and shades. One of the easiest ways of doing this is to make a very small dye batch and using a measuring cup to make a note of how much of each colour you are adding. Using a paper towel, or fabric off cuts you can keep checking the dye until you find a colour you are happy with.